Converting fisheye image to equirectangular image
The python version of the code is inspired by this repository.[2] Significant changes have been made to improve the real-time performance of the code.
Contributions
Elimination of nested for a loop by implementing NumPy based vectorized calculations.
Nested for loop calculations in the reference repository results in high computation time.
Conversion map is saved as an object attribute so it can be reused for consecutive frames without any need to recompute the mapping in cases where the mapping parameters are not changing.
Average computation time for conversion for both methods has been tabulated for various output dimensions to explain the significant improvement in real-time performance of the code. Computation time for conversion by reusing the map stored as an object attribute is also given in the table.
Output image resolution |
Nested for loop based calculations [2] |
Vectorized calculations (ours) |
Reusing the map (ours) |
|---|---|---|---|
1600x3200 |
52.46 s |
3.26 s |
0.19281 s |
800x1600 |
12.73 s |
0.76 s |
0.03779 s |
400x800 |
3.48 s |
0.197 s |
0.00457 s |
200x400 |
0.83 s |
0.069 s |
0.00249 s |
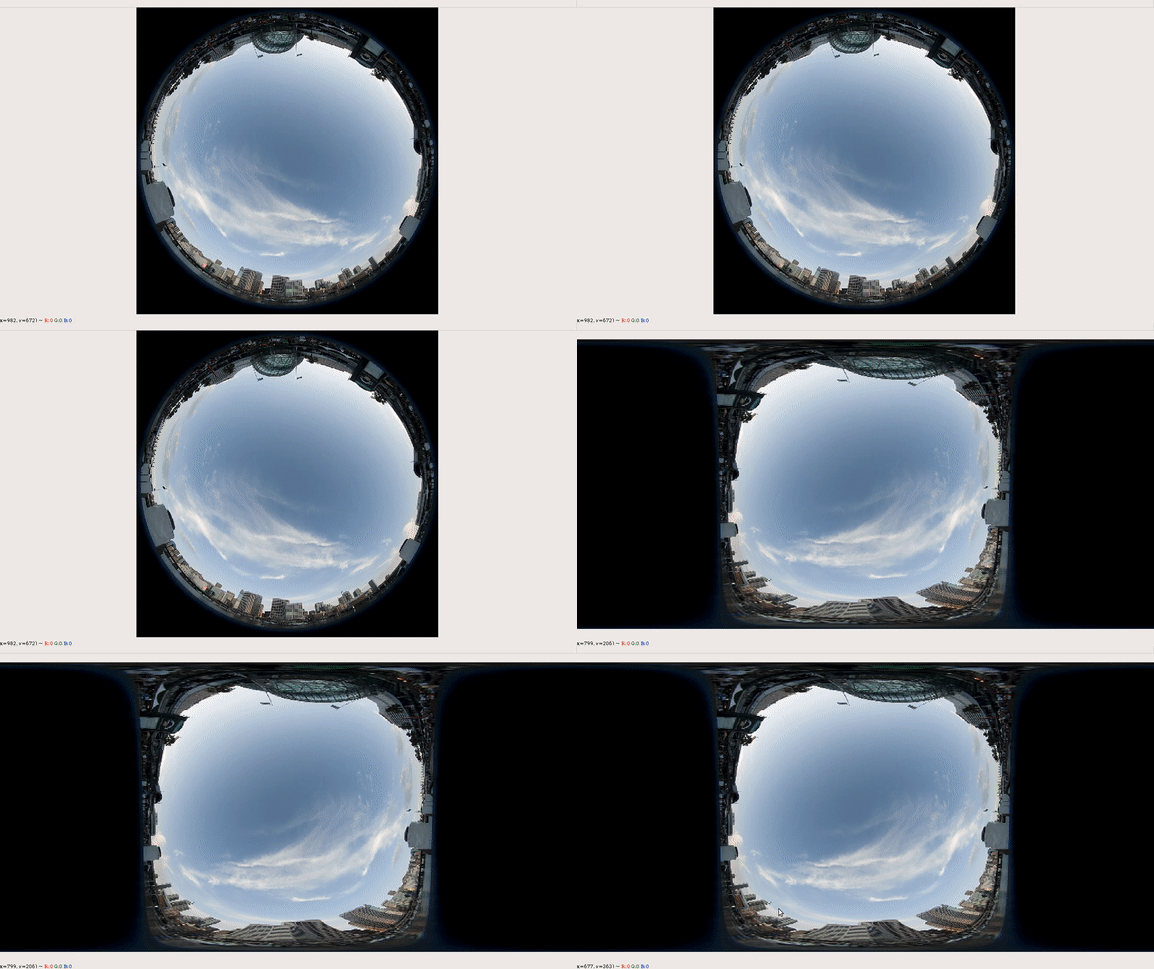
Two different modes are provided for converting fisheye image to an equirectangular image. The second mode is especially useful in cases where the camera is placed parallel to the ground, facing the sky.
Mode 1 |
Mode 2 |
|---|---|
|
|
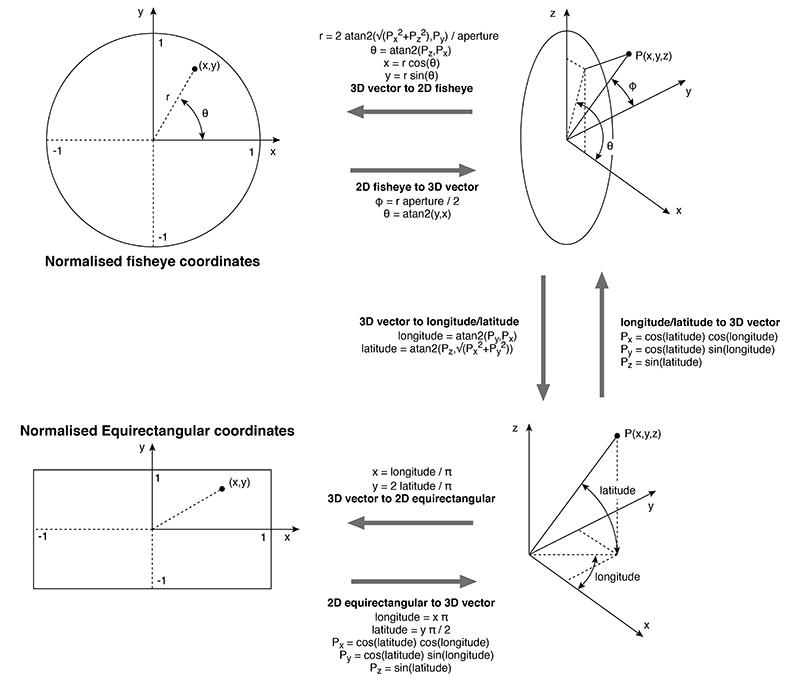
Conversion flowchart
The following figure explains the inter-conversion between a fisheye image and an equirectangular image (source.)[1]

Inter-conversion between a fisheye image and an equirectangular image[1]
Python Example
-
fisheyeImgConv.fisheye2equirect(srcFrame,outShape,aperture=0,delx=0,dely=0,radius=0,edit_mode=False)` - Parameters
srcFrame – Input fisheye image
outShape – Desired shape of the output image in form of a tuple [Image_Height,Image_Width]
aperture – Aperture of the fisheye camera. Can be determined using the GUI provided.
delx – Shift in center x coordinate
dely – Shift in center y coordinate
radius – Radius of the circle containing the fisheye image
edit_mode – Boolean to allow editing the parameters. Useful in the GUI provided.
#!/usr/bin/env/python
import cv2
import numpy as np
import math
import sys
from omnicv import fisheyeImgConv

Img_path = sys.argv[1]

# Path to the file containing fisheye camera parameters (obtained using GUI)
param_file_path = "../fisheyeParams.txt"

# Reading the fisheye image
frame = cv2.imread(Img_path)

outShape = [400,800]
inShape = frame.shape[:2]

# In case of fisheye lens placed vertically
mapper = fisheyeImgConv(param_file_path)
frame2 = mapper.fisheye2equirect(frame,outShape)

# Use the below line if there are multiple images and the mapping is not changing in case of a video
frame2 = mapper.applyMap(0,frame)

cv2.imshow("image",frame2)
cv2.waitKey(0)
C++ Example
-
fisheyeImgConv::fisheye2equirect(const cv::Mat &srcFrame, cv::Mat &dstFrame, cv::Size outShape, -
int aperture, int delx, int dely, int radius, bool edit_mode)` - Parameters
srcFrame – Input fisheye image
outShape – Desired shape of the output image in form of a tuple [Image_Height,Image_Width]
aperture – Aperture of the fisheye camera. Can be determined using the GUI provided.
delx – Shift in center x coordinate
dely – Shift in center y coordinate
radius – Radius of the circle containing the fisheye image
edit_mode – Boolean to allow editing the parameters. Useful in the GUI provided.
#include<iostream>
#include<opencv2/opencv.hpp>
#include"../omnicv/utils.hpp"
#include <opencv2/core/core.hpp>

// Creating the display window
int H = 500;
int W = 500;

std::string WINDOW_NAME{"viewer"};

int main()
{
  cv::namedWindow(WINDOW_NAME,CV_WINDOW_NORMAL);

  cv::Mat frame;
  cv::Mat outFrame;

  frame = cv::imread("../data/fisheye_horizontal2.jpg");

  cv::imshow(WINDOW_NAME,frame);
  cv::waitKey(0);

  fisheyeImgConv mapper1("../fisheyeParams.txt");

  mapper1.fisheye2equirect(frame, outFrame, cv::Size (800,400));
  cv::imshow("output",outFrame);
  cv::waitKey(0);
  mapper1.applyMap(0,frame,outFrame);
  cv::imshow("output 2",outFrame);
  cv::waitKey(0);


  return 0;
}

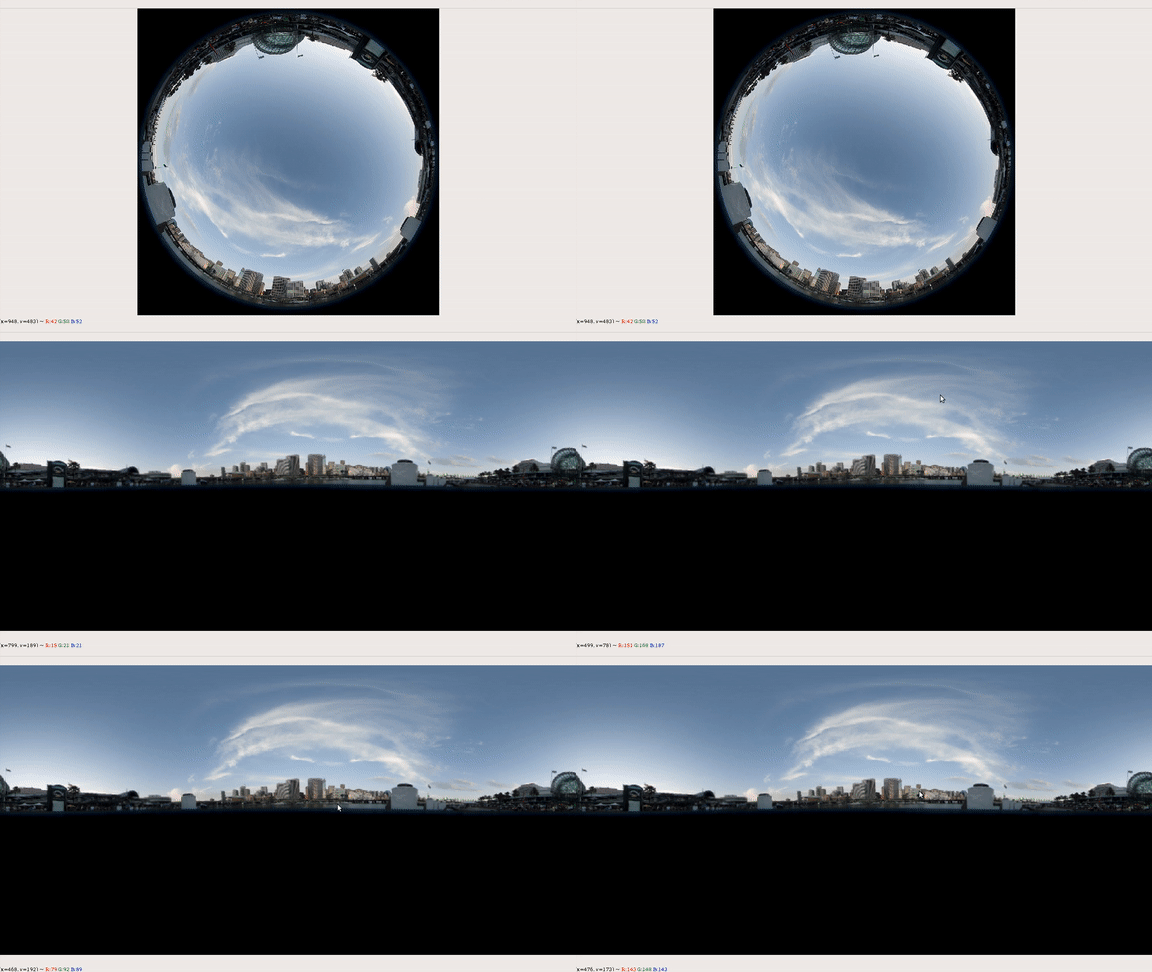
Example output for the code
For more examples of this method read this code.
Click here to refer the documentation for the GUI to determine the fisheye parameters
References
[1] Converting dual fisheye images into a spherical (equirectangular) projection - http://paulbourke.net/dome/dualfish2sphere/
[2] Github repository py-fisheye-dewarp - https://github.com/BlueHorn07/py-fisheye-dewarp
